The Distribute to Layers command (Shift+Ctrl+D or Shift+z+D) is a great timesaver if you're managing multiple elements that you need to move to animate on individual layers. If you've imported several items to the Document window, or you've created a complex graphic that you decide needs to be split up on different layers, you can use this command to do most of the work for you. Instead of having to manually create new layers and copy and paste items one by one, you can select a number of individual items in the Document window and apply Distribute to Layers to have Flash automatically create a layer for each selected item.
To apply Distribute to Layers, select the items that you want to have moved to discrete layers — these items can be symbols, groups, shapes, text blocks, and even bitmaps or video objects. Choose Modify ð Timeline ð Distribute to Layers from the application menu, or choose Distribute from the contextual menu. Strokes and fills for an individual shape will be kept together on the same layer, as will items in a group or a multipart symbol. The items you select can be on different source layers, but they must all be on the same frame of the Timeline. When items have been distributed to new layers, you can delete any old layers that have been left empty.
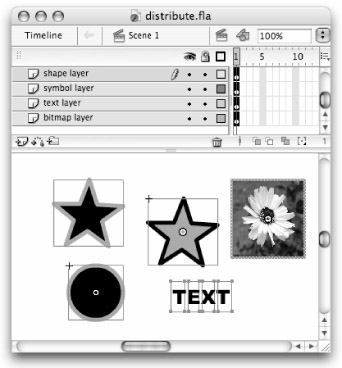
The auto-created layers will be stacked from top to bottom below the currently selected layer in the order that the selected items were created. So the most recently created item should be placed on a layer at the bottom of the stack, just above the layer that was formerly below the selected layer, while the item that was created before the others in the selection will be placed at the top of the stack, just below the currently selected layer. If you are completely disoriented by now, have a look at Figure 13-24 to see a file with the layer order before applying Distribute to Layers to the selected items, and look at Figure 13-25 to see how the new layers are stacked and named.

Characters from a broken-apart text block will be stacked in layers in the same order that the text block was created (from left to right, right to left, or top to bottom). Flash names autocreated layers with the following conventions:
A new layer made for any asset stored in the Library (a symbol, bitmap, or video clip) will be given the same name as the asset.
A new layer made for a character from a broken-apart text block will be named with the text character or letter.
| Caution |
When you apply Distribute to Layers to text blocks that have not been broken apart, new layers will be named with the entire text string. It is best to rename these layers because they will usually be difficult to read and may even exceed the 64-character limit for layer names. |
A new layer made for a shape (which is not stored in the Library) will be named in the same numeric sequence as other layers in the current document (Layer 1, Layer 2, and so on).
A new layer made for a named symbol instance will be given the instance name instead of the stored symbol name.
Any layer can always be renamed after it has been created.
| Web Resource |
We'd like to know what you think about this chapter. Visit www.flashsupport.com/feedback to fill out an online form with your comments. |