| [ Team LiB ] |
|
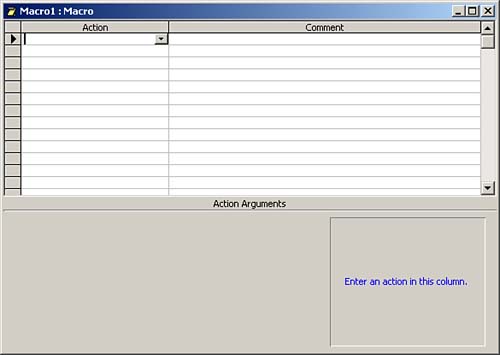
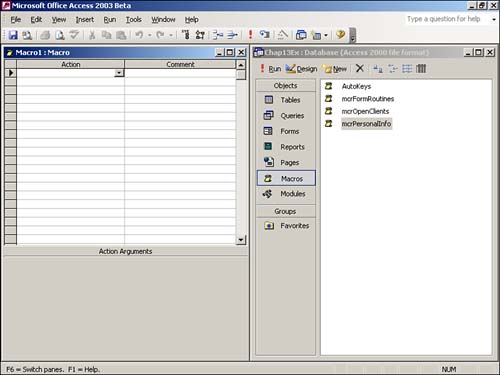
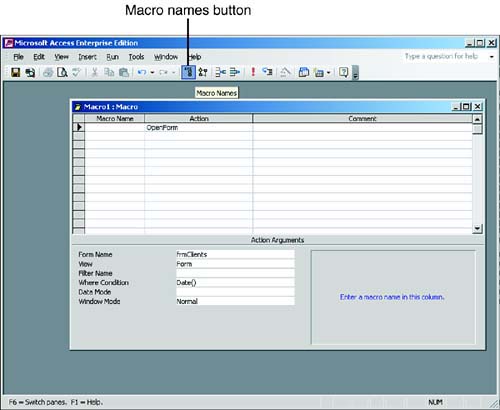
The Basics of Creating a MacroTo create a macro, you click the Macros tab from the Database window and then click New to open the Macro design window shown in Figure 13.1. In this window, you can build a "program" by adding macro actions, arguments, names, and conditions to the macro. Figure 13.1. The Macro design window, showing the Action and Comment columns.
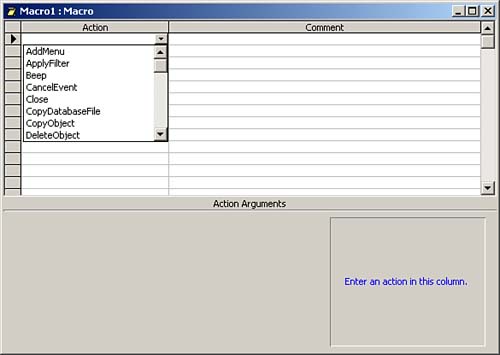
Macro actions are like programming commands or functions; they instruct Access to take a specific actionfor example, to open a form. Macro arguments are like parameters to a command or function; they give Access specifics on the selected action. For example, if the macro action instructs Access to open a form, the arguments for that action tell Access which form it should open and how it should open it (in Form, Design, or Datasheet view, or using Print Preview). Macro names are like subroutines. You can include several subroutines in one Access macro, and you identify each of these subroutines by its macro name. Macro conditions allow you to determine when Access executes a specific macro action. For example, a company might want an inventory reorder form to open if an item is low or out of stock. If the item is fully stocked, perhaps just a detailed description form would display. Macro ActionsAs mentioned earlier, a macro action instructs Access to perform a task. You can add a macro action to the Macro design window in several ways. One method is the following:
You use this method of selecting a macro action if you aren't sure of the macro action's name and want to browse the available actions. After you have been working with macros for a while, you will know which actions you want to select. Rather than open the drop-down list and scroll through the entire list of actions, you can click a cell in the Action column and then start typing the name of the macro action you want to add. Access fills in the field with the first macro action that begins with the character(s) you type. You use the OpenTable, OpenQuery, OpenForm, OpenReport, and OpenModule actions to open a table, query, form, report, and module, respectively. You can select these actions and their associated arguments quite easily by using a drag-and-drop technique:
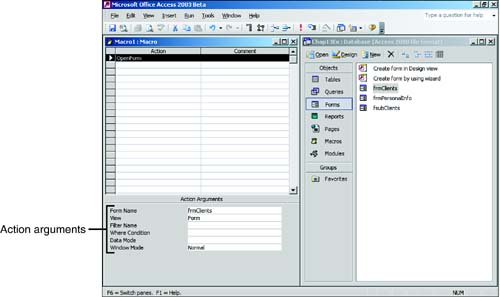
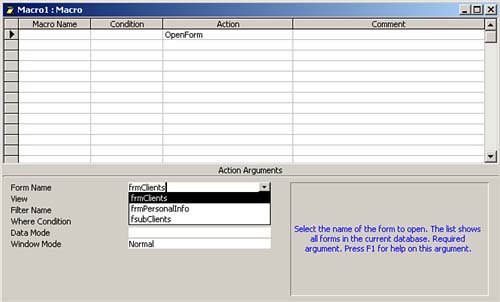
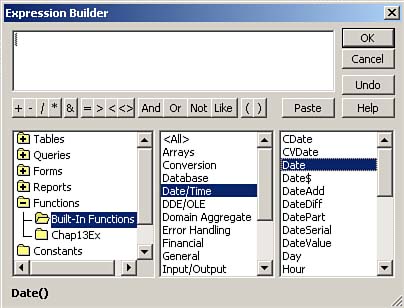
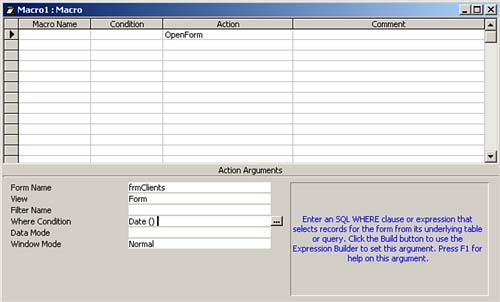
Dragging and dropping a table, query, form, report, or module onto the Macro design window saves you time because Access automatically fills in all the macro action arguments for you. Notice in Figure 13.4 that Access associates six action arguments with the OpenForm action: Form Name, View, Filter Name, Where Condition, Data Mode, and Window Mode. The drag-and-drop process fills in three of the arguments for the OpenForm action: the name of the form (frmClients), the view (Form), and the window mode (Normal). The next section more thoroughly covers macro action arguments. Action ArgumentsAs mentioned previously, macro action arguments are like command or function parameters: They give Access specific instructions on how to execute the selected macro action. The available arguments differ, depending on what macro action you select. Some macro action arguments force you to select from a drop-down list of appropriate choices; others allow you to enter valid Access expressions. Access automatically fills in macro action arguments when you click and drag a Table, Query, Form, Report, or Module object to the Macro design window. In all other situations, you must supply Access with the arguments required to properly execute a macro action. To specify a macro action argument, follow these steps:
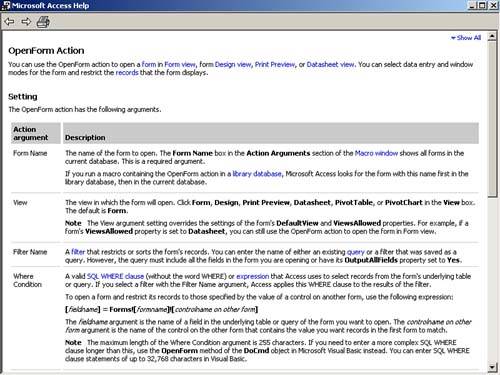
Remember that each macro action has different macro action arguments. Access requires some of the arguments associated with a particular macro action, and others are optional. If you need help with a particular macro action argument, you can click the argument, and Access gives you a short description of that argument. If you need more help, you can press F1 to see Help for the macro action and all its arguments. (See Figure 13.8.) Figure 13.8. Help on the OpenForm action.
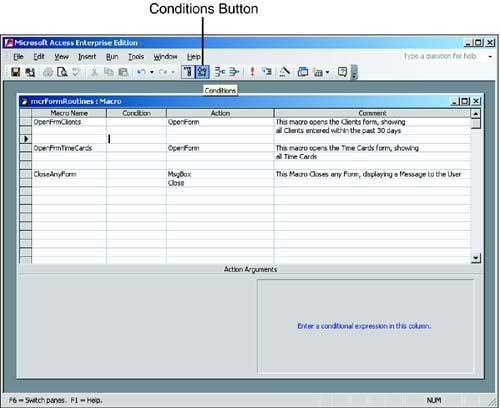
Macro NamesAs mentioned previously, macro names are like subroutines: They allow you to place more than one routine in a macro. This means you can create many macro routines without having to create several separate macros. You should include macros that perform related functions within one particular macro. For example, you might build a macro that contains all the routines required for form handling and another that has all the routines needed for report handling. You need to take only two steps to add macro names to a macro:
Macro ConditionsAt times, you want a macro action to execute only when a certain condition is true. Fortunately, Access allows you to specify the conditions under which a macro action executes:
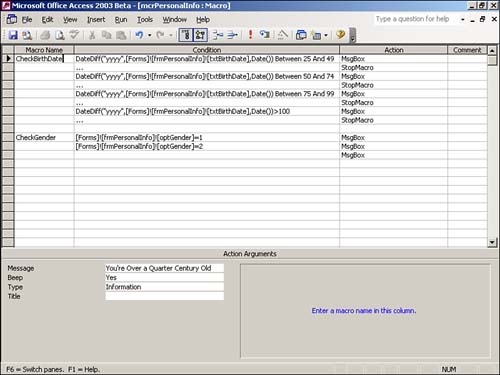
The macro pictured in Figure 13.12 evaluates information entered on a form. The CheckBirthDate subroutine evaluates the date entered in the txtBirthDate text box. Here's the expression entered in the first condition:
DateDiff("yyyy",[Forms]![frmPersonalInfo]! _
    [txtBirthDate],Date()) Between 25 And 49
Figure 13.12. An example of a macro that contains conditions.
This expression uses the DateDiff function to determine the difference between the date entered in the txtBirthDate text box and the current date. If the difference between the two dates is between 25 and 49 years, the macro displays a message box indicating that the person is over a quarter century old. The ellipsis on the second line of the CheckBirthDate subroutine indicates that Access should execute the macro action only if the condition entered on the previous line is true. In this case, if the condition is true, the action terminates the macro. If the value in the text box doesn't satisfy the first condition, the macro continues evaluating each condition in the subroutine. The CheckBirthDate subroutine displays an age-specific message for each person 25 years of age and older. If the person is younger than 25, the text box value does not meet any of the conditions, and the macro does not display a message. The CheckGender subroutine works a little bit differently. It evaluates the value of the optGender option group. One of the first two lines of the subroutine executes, depending on whether the user selects the first or second option button. The third line of the subroutine executes, regardless of the Option Group value because the macro does not contain an ellipsis on that line of the macro action's Condition column. If you do not enter an ellipsis on any line of the subroutine, the macro action executes unconditionally. If you place an ellipsis before the line, the macro action executes only if the value of OptGender is 2. |
| [ Team LiB ] |
|