Creating a Yes/No Field
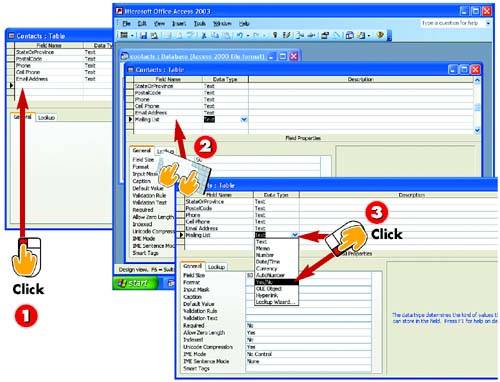
 | After you've opened the table you want to change in Design view, click in the first empty row or insert a new row. |
 | Type a name for the field (in this example, Mailing List) and press Tab to move the insertion point to the Data Type column. |
 | Click the down arrow that appears in the Data Type column and click the Yes/No option in the list that appears. |
|
In Part 2, you learned how to create a table, but not about all the different types of fields you can add to a table. One such field type is the Yes/No field, useful for situations in which there are only two possible valid entries for a field: yes or no, true or false, or on or off. For example, you might use a Yes/No field to indicate whether a customer wants to be on a mailing list. You can add this type of field when you first create your table or later (as covered here). |
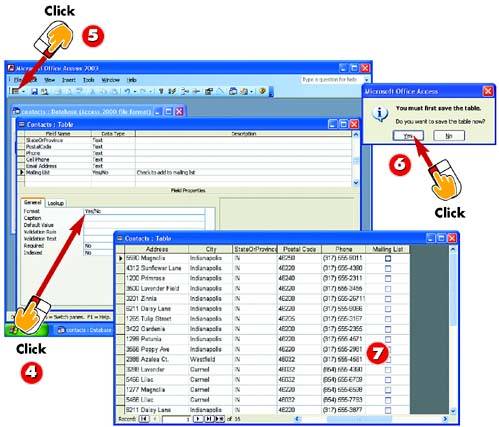
 | Make changes as needed to the field properties in the property sheet. For example, change the Format property from Yes/No to True/False or On/Off. |
 | Click the View button on the Standard toolbar in the main Access window to toggle to Datasheet view. |
 | Before it changes to Datasheet view, Access prompts you to save the changes to the table; click Yes to do so. |
 | The Yes/No field is added. Here it is formatted as a check box; click the check box to select it for Yes, or leave it blank for No. |
|
Yes/No Field Displays
To change how a Yes/No field is displayed in the Datasheet and forms, click the Lookup tab in the property sheet, open the Display Control drop-down list, and choose Check Box, Text Box, or Combo Box. |
 |