


Connectors come in five different routing styles:
Style |
Description |
Direct |
A straight line from element A to element B. You can move the line (back and forward, up and down) to a limited degree. |
Auto Routing |
A vertical and horizontal route from A to B with 90-degree bends. You can move the line to improve the route, but the location and number of bends are not configurable. |
Bezier |
A smooth curved line from A to B. Bezier style is available for State Flows, State Transitions, Object Flows, and Control Flows |
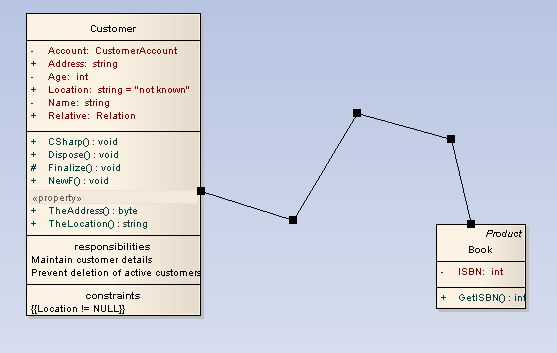
Custom |
The most flexible option. You can add one or more line points and bend and push the line into virtually any shape, using the Toggle Line Point at Cursor option. |
Tree (Horizontal, Vertical) |
A line from element A to B with two bends, and the end points fixed to selected locations on the elements (Horizontal or Vertical). |
Set the Connector Style
To set the connector style, follow the steps below:
| 1. | Right-click on the connector to change; the context menu displays. |
| 2. | Select the Set Line Style option. |
| 3. | From the submenu, select the required style. |
Alternatively:
| 1. | Select the connector to change. |
| 2. | Press the following keys to change the style: |
| · | [Ctrl]+[Shift]+[D] for Direct |
| · | [Ctrl]+[Shift]+[A] for Auto Routing, or |
| · | [Ctrl]+[Shift]+[C] for Custom. |
Bend Connectors
To bend a connector to quickly and easily route connectors in the required layout, follow the steps below:
| 1. | Right-click on the connector; the context menu displays. |
| 2. | Set the line style to Custom Line ([Ctrl]+[Shift]+[C]); this enables the Bend Line at Cursor option in the context menu. |
| 3. | Click on the Bend Line at Cursor option to add a line point. |
Note: Right-clicking a line point displays the Straighten Line at Cursoroption, which you can use to remove the line point.
| 4. | Using the mouse, drag the line point to the required position. |
Alternatively:
| 1. | Hold down [Ctrl] and click on a point on the connector to create a line point. |
Note: [Ctrl]+click also removes a line point.
| 2. | Using the mouse, drag the line point to the required position. |
To tidy line angles (custom connector), follow the steps below:
| 1. | Right-click on the connector; the context menu displays. |
| 2. | Click on the Tidy Line Angles menu option; this nudges the custom line in horizontal and vertical increments, saving you the time of trying to get a good layout manually. |
Tip: You can set the Tidy Line Angles option to operate by default; click on the Tools | Options menu option to display the Options dialog, and select the Diagram Behavior page.

Suppress Line Segments
To suppress individual line segments. follow the steps below:
| 1. | Right-click on the connector; the context menu displays. |
| 2. | Set the line style to Custom Line ([Ctrl]+[Shift]+[C]), this enables the Suppress Line Segment option in the context menu. |
| 3. | Click on the Suppress Line Segment option to suppress a line between two bend points. |
Note: The segment you right-clicked is suppressed.
| 4. | To show the segment again, right-click on the line and click on the Show All Line Segments option. |