


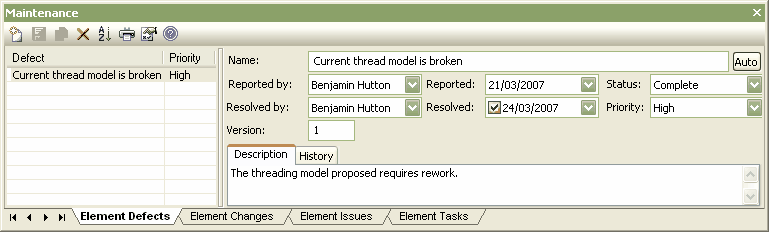
Note: This topic describes the Element Defects tab of the Maintenance window. The Element Changes, Element Issues and Element Tasks tabs differ only in minor details such as field names.
Element defect details are recorded via the Element Defects tab. To access this tab, follow the steps below:
| 2. | Open a diagram and select an element. All of the maintenance entries for that element are shown in the Maintenance window, under the various tabbed sections. |
| 3. | Click on the Element Defects tab. |
| 4. | To: |
| · | Add a new item, click on a blank line in the Defect list and complete the fields as described in the table below |
| · | Modify an existing item, click on that item in the Defect List and edit the fields as described in the table below |
| · | Delete an existing item, right-click on the item in the Defect list and select the Delete context menu option. |
| 5. | Click on the Save button in the window toolbar. |
Complete or edit the following fields on the Maintenance window:
Field |
Description |
Defect |
Displays a list of recorded defects associated with the element. |
Name |
Type the name or a short description of the defect. |
Reported by |
Click on the drop-down arrow and select the name of the person who reported the defect. |
Reported |
Click on the drop-down arrow and select the date on which the defect was reported. |
Status |
Click on the drop-down arrow and select the defect status, such as Complete or Approved. |
Resolved by |
Click on the drop-down arrow and select the name of the person who fixed the defect. |
Resolved |
Click on the drop-down arrow and select the date on which the defect was resolved. |
Priority |
Click on the drop-down arrow and select the priority assigned to resolving the defect. |
Version |
Type the version number associated with this fix. |
Description |
Type a longer description of the defect. |
History |
Click on this tab and enter any notes or references to previous occurrences of this defect. |