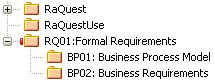
Before you can use a controlled package, you must configure it with options such as the filename to save to/load from, the type of export and the version number. Once a package is configured and marked as controlled, it is displayed in the Project Browser window with a small colored rectangle next to the package icon, indicating it is a controlled package. In the example below, the RQ01: Formal Requirements package is a controlled package.
Configure a Controlled Package
To configure a controlled package, follow the steps below:
| 1. | In the Project Browser window, right-click on the package to control or configure. The context menu displays. |
| 2. | Click on the menu option. The Package Control Options dialog displays.
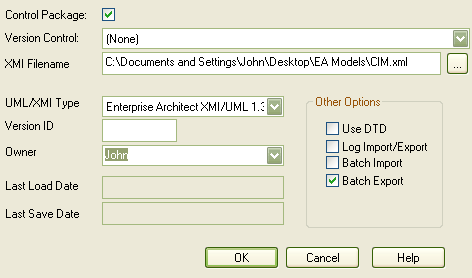 |
| 3. | Set the required options, as follows: |
| · | Select the checkbox to indicate that this is a controlled package |
| · | Click on the drop-down arrow and select the version control repositories; this connects the package to a specific version control configuration |
| · | In the field, type or browse for the path and XMI file for importing and exporting XMI files. The field accepts Local Path Substitution strings; for example, use an XMI local path definition where:
myLocalPath="C:\Documents and Settings\John\Desktop\EA Models"
Then %myLocalPath%\CIM.xml is equivalent to C:\Documents and Settings\John\Desktop\EA Models\CIM.xml |
| · | In the field, click on the drop-down arrow and select the type of XMI generated; options include Enterprise Architect XMI/UML 1.3, Rational Rose/Unisys UML 1.3 and Generic XMI 1.0/UML 1.3. Currently only Enterprise Architect UML 1.3 is supported for complete import/export round tripping of packages |
| · | In the field, type the version ID number |
| · | In the field, type or select the name of the package owner |
| · | If required, click on the checkbox to use a Data Type Definition (DTD) |
| · | If required, click on the checkbox to log import and export activity to a log file |
| · | If required, click on the checkbox to mark the package as a Batch Import package |
| · | If required, click on the checkbox to mark the package as a Batch Export package. |
| 4. | Click on the button to set the Package Control options. |
Note: For batch import, the file date of the XMI file is stored. You can bypass the batch import if the file date of the last import matches that of the current file (ie. there is no change).


