


Using a Pattern enables you to use items defined in the Pattern with the UML model. Using Patterns enables you to rapidly create template solutions for code structures that perform the same type of task in other situations.
To use a Pattern that you have previously imported into the model, follow the steps below:
| 1. | Open the diagram into which you want to add the UML Pattern. |
| 2. | Select the Resources window. |
| 3. | Expand the UML Pattern folder and find the Pattern to add. |
| 4. | Either: |
| · | Right-click on the Pattern and select the Add Pattern to Diagram menu option or |
| · | Drag and drop the Pattern from the Resources window onto the diagram. |
(You can also view the Pattern details in read-only mode by selecting the View Pattern Details menu option.)
The Add Pattern dialog displays.

Control |
Description |
||||
Preview |
This panel displays a preview of the Pattern; click on the Preview link to open a view of the Pattern and drag the sides into as large a picture as you require. |
||||
Pattern Elements |
This panel provides access to the individual elements contained in the Pattern. From here you can:
|
||||
Element Notes |
This panel displays the comments that describe the element in the Pattern. Highlight an element in the Pattern Elements panel to view the notes. |
| 5. | Once the appropriate selections have been made, click on the OK button to import the Pattern into the model, recreating the original diagram with new GUIDs. |
Change Pattern Element Default
To change the default of the Pattern element, follow the steps below:
| 1. | From the Add Pattern dialog select the individual element in the Pattern Element panel. |
| 2. | Click on the [...] button to display the Edit dialog. The specific method for changing the element name is dependant upon the entry in the Action column of the Pattern Elements panel. |
| 3. | If the Action entry is Create, then in the Default field in the Edit dialog delete the existing value and type your own, user-defined value. Click on the OK button. The element default is updated on the Add Pattern dialog. |
| 4. | If the Action entry for the element is Merge, in the Edit dialog click on the [...] button to browse to an existing element classifier. The Set Element Classifier dialog displays.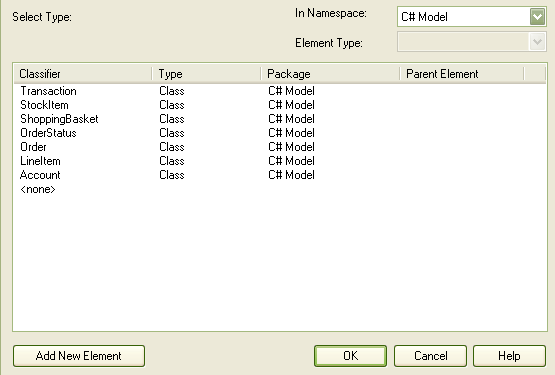 |
| 5. | Select an existing element classifier from the Classifier list. You can restrict the number of choices by selecting the elements from a specific namespace; to do this, click on the In Namespace drop-down arrow and select a namespace. For more information regarding setting element classifiers see the Using Classifiers topic. |