


To create a Foreign Key, follow the steps below:
| 1. | Locate the required Tables in either a diagram or the Project Browser window. |
| 2. | Select an Associate link in the Class Relationships page of the Enterprise Architect UML Toolbox. |
| 3. | Click on the Table to contain the Foreign Key (source) and draw a connector to the other Table (target). |
| 4. | Use the link context menu to display the Foreign Key dialog. 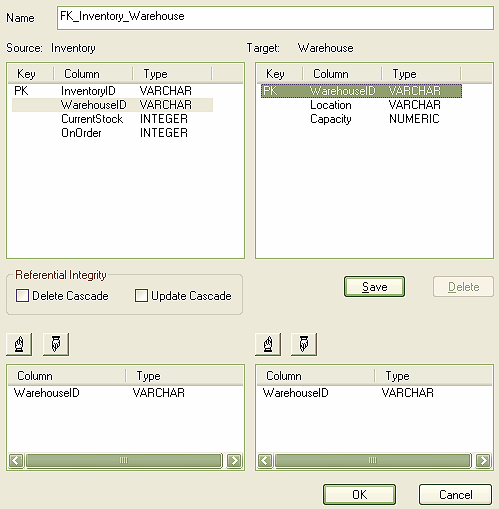 |
| 5. | If necessary, edit the default name for the Foreign Key. |
| 6. | Highlight the columns involved in the Foreign Key relationship. |
| 7. | Click on the Save button to automatically generate the Foreign Key operations. |
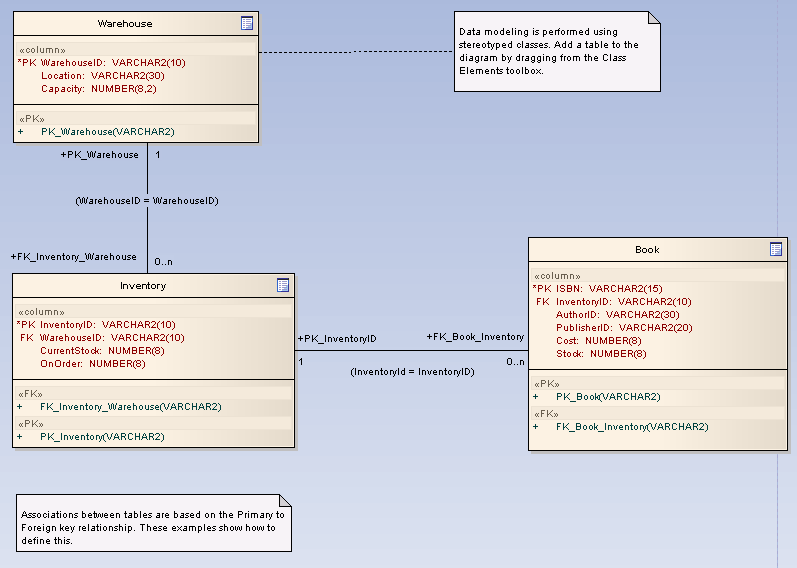
You have created the Foreign Key. The example below shows how this looks in a diagram:
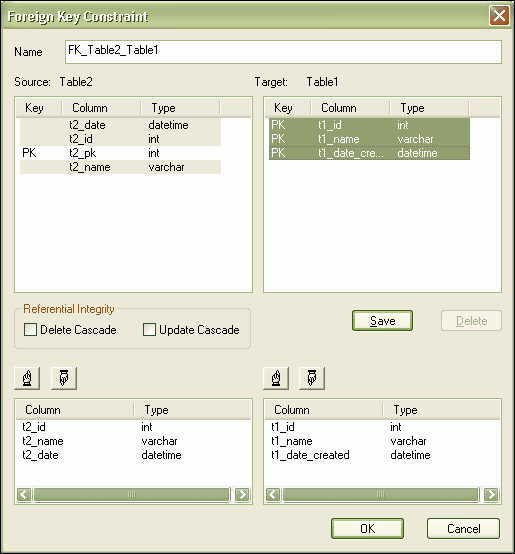
Composite Foreign Key
To create a composite Foreign Key, select the appropriate columns and click on the Save button. The Foreign Key columns are sorted according to datatype to match the datatypes of the targeted composite Primary Key. If required, you can change the order of the key columns by clicking on the ![]() and
and ![]() buttons.
buttons.
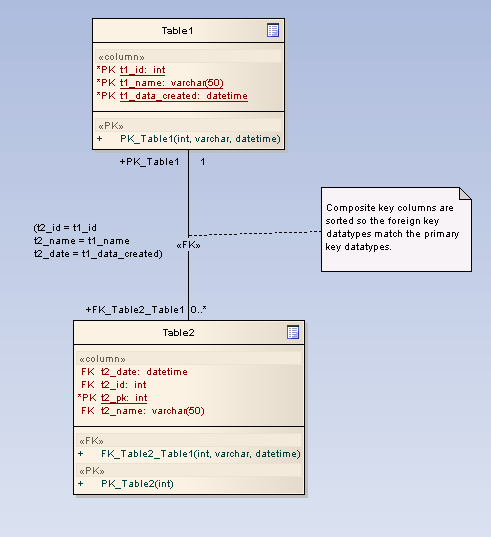
This creates the composite Foreign Key. The example below shows how this looks in a diagram:
Tip: If you are defining a MySQL database and want to use Foreign Keys, you must set the table type to enable this.