ActionScript offers many classes, and one of the most exciting classes to use is the Sound class. As with most classes, the Sound class has predefined methods that you can use to control each new Sound class. Table 27-2 provides an overview of the Sound class and its common methods.
|
Method |
Definition |
Options |
|---|---|---|
|
attachSound |
Creates a new instance of a sound file (.aif or .wav) available in the Library. The new instance becomes a part of the Sound instance and can be targeted with Sound instance methods. Unlike name. attached Movie Clips, attached sounds do not require a depth number. |
soundObject.attachSound(libraryID); where: soundObject refers to the Sound instance's name libraryID is the name of the sound in the Symbol Linkage properties (available in the Library). |
|
loadSound |
Loads a separate MP3 audio source file (.mp3) into a Sound object. You can begin playback of the MP3 sound as soon as enough bytes have downloaded, or wait until the entire file has downloaded. We will show you how to use this new method in Chapter 28, "Sharing and Loading Assets." |
soundObject.loadSound(URL, isStreaming); where: URL is the location of the MP3 file. This location can be a relative or absolute path isStreaming determines if the loading sound will begin playback as soon as enough bytes have downloaded (true), or if the entire sound must download before playback can begin (false). |
|
start |
Plays the targeted Sound instance. A sound must be attached to the Sound instance before it can play. |
soundObject.start(inPoint, loopFactor); where: inPoint is the time (in seconds) in the sound where playback should begin. loopFactor is the number of times the sound should be repeated. Both of these parameters are optional and can be omitted. |
|
stop |
Stops playback of the targeted Sound instance. If no target is specified, all sounds are stopped. Note that this is not equivalent to pausing a sound. If a stopped sound is played later, it will start at the beginning (or at the inPoint). |
soundObject.stop(libraryID); where: libraryID is the name of the sound in the Linkage properties (available in the Library). |
|
setVolume |
Changes the overall volume of the specified Sound instance. This method accepts values between 0 and 100 (in percentage units). You can enter percentages greater than 100 percent to increase sound output beyond its original recording level, but you may notice digital distortion of the sound. |
soundObject.setVolume(volume); where: volume is a number between 0 and 100. |
|
getVolume |
Retrieves the current volume of the Sound instance. |
soundObject.getVolume(); No options or arguments for this method. |
|
setPan |
Changes the offset of sound output from both the left and right channels. |
soundObject.setPan(panValue); where: panValue is a value between -100 (full left-speaker output) and 100 (full right-speaker output). Use a value of 0 to balance sound output evenly. |
|
getPan |
Retrieves the values created with a previous setPan execution. You use this method to apply Pan settings consistently to multiple objects, or to store a Pan setting. |
soundObject.getPan(); No options or arguments for this method. |
|
setTransform |
Changes the volume for each channel of the specified Sound object. This method also enables you to play the right channel in the left channel and vice versa. |
soundObject.setTransform(soundTransformObject); where: soundTransformObject is the name of an object that has percentage properties for left and right output for the left channel, and left and right output for the right channel. |
|
getTransform |
Retrieves the values established with the last setTransform execution. You use this method to reapply sound transforms to new Sounds objects, or to store setTransform values. |
soundObject.getTransform(); No options or arguments for this method. |
| New Feature |
Flash Player 8 can support up to 32 channels of audio (or 16 channels of stereo audio) simultaneously. |
The following list of Sound class features offers reasons for using Sound instances over traditional sound Movie Clips or keyframe sounds. You have:
Dynamic event sounds that play in a random or user-defined order
Precise control over volume and panning
The ability to dump (or erase) a Sound object when the sound is no longer needed
| Note |
All Sound objects are treated as Event sounds. You cannot use Sound objects to control the playback or frame rate like Stream sounds can. However, ActionScript does enable you to load MP3 files on the fly and "stream" their playback — these types of sounds, however, cannot control playback or frame-rate synchronization. For more information on Synch modes for sound, please refer to Chapter 15, "Adding Sound." (The usage of the term "stream" in this context does not imply real-time streaming, but rather a progressive download for the MP3 file.) |
The Sound class uses sounds directly from the movie's library or from an MP3 file loaded at run time. You cannot use the Sound class to control sounds specified in the Property inspector for any given keyframes.
| Tip |
You can, however, control Stream sounds attached to keyframes on a given timeline by controlling an empty Sound object. Any methods applied to the Sound object will be passed along to the Stream sound. |
The next section shows you how to create Sound objects using the object constructor with the attachSound() and start() methods.
In the Chapter 19, "Building Timelines and Interactions," you learned how to use behaviors to identify and play sounds. From a conceptual point of view, manually creating each sound behavior enabled you to see and work with each sound "object" very easily. However, you can produce the sounds for a sound library much more quickly using your own ActionScript code.
| On the CD-ROM |
In this section, you start with the linked sounds you created in Chapter 19, "Building Timelines and Interactions." Make a copy of the pianoKeys_sounds.fla file from the ch19 folder of this book's CD-ROM. |
Using the Open External Library command in the File ⇨ Import menu, select your copy of the pianoKeys_sounds.fla file. Opening a Flash document as a Library enables you to access symbols and media in that file.
If you don't have a new untitled Flash document open, create a new Flash file (Ctrl+N or ?+N). Save the new document as soundLib_ActionScript.fla.
Change the background color of the document to black in the Document Properties d0ialog box (Modify ⇨ Document).
Open the new document's Library panel (Ctrl+L or ?+L). Drag each of the key_ sounds from the pianoKeys_sound Library panel into the Library panel of your new document. When you are finished, you should see all seven sounds in your new document's Library panel, as shown in Figure 27-6.
Close the pianoKeys_sounds Library panel, and save your Flash document.
Now, you need to add the ActionScript code that will create your Sound objects. You will construct a function that, when executed, will form a list of sound instances. On the Main Timeline (that is, Scene 1), rename Layer 1 to actions. Alt+double-click (or Option+double-click on the Mac) frame 1 of this layer. This opens the Actions panel. Type the following code into the Script pane:
var aSounds:Array;

function createLib(num:Number):Void {
       var mcLib:MovieClip = this.createEmptyMovieClip("mcLib", 1);
       aSounds = new Array();
       for (var i:Number = 1; i<=num; i++) {
The first line establishes an array variable named aSounds, which will store references to each new sound added to the sound library. The next line of code establishes the name of your function, createLib(). You will want to dynamically change the number of sounds you create with this function. Therefore, we assign an optional parameter (called an argument) num that will be passed to the nested actions within the function.
The third line creates an empty MovieClip object, mcLib. This instance will hold individual sound targets, which you create in the next step.
The fourth line creates a new Array object, aSounds. This array stores the Sound objects that the createLib() function creates.
The fifth line starts a for loop that cycles its nested actions until the condition i<=num is no longer true. i starts (or initializes) with a value of 1, and the syntax i++ tells i to increase by 1 with each pass of the for loop.
In the next step, you want the for loop to create a new instance of the Sound object for each sound in the Library, and attach each sound in the Library to its new instance.
In the Actions panel, add the following ActionScript to the code from Step 6:
  var mc:MovieClip = mcLib.createEmptyMovieClip("mcSnd_"+i, i);
  var snd:Sound = new Sound(mc);
  snd.attachSound("key_"+i);
  aSounds.push(snd);
 }
}
The first line creates a new MovieClip object, whose name starts with mcSnd_. This instance is stored with the mcLib instance. The local variable mc is a reference to the new MovieClip object as well. With each pass of the loop, a new instance is created (for example, mcSnd_1, mcSnd_2, and so on). Each instance is used to store the attached sound later in the for loop.
The second line makes a new Sound object that points to the timeline referenced by the target variable. Ultimately, your Sound objects will be tied to instances nested within the mcLib Movie Clip instance, which you'll see later.
The third line uses the attachSound() method to take a sound element in the Library and attach it to the Sound object. The argument for the attachSound() method is specified as "key_" + i. On each pass of the for loop, this expression will return "key_1", "key_2", and so on until the limit prescribed by the num argument is reached.
The complete block of code on the first keyframe of the actions layer is shown in Listing 27-5.
Listing 27-5: The createLib() Function
var aSounds:Array;

function createLib(num:Number):Void {
   var mcLib:MovieClip = this.createEmptyMovieClip("mcLib", 1);
   aSounds = new Array();
   for (var i:Number = 1; i <= num; i++) {
      var mc:MovieClip = mcLib.createEmptyMovieClip("mcSnd_" + i, i);
      var snd:Sound = new Sound(mc);
      snd.attachSound("key_" + i);
      aSounds.push(snd);
   }
}
Now that you have a function defined to create all the Sound objects, you need to invoke the function. With the code for frame 1 of the actions layer displayed in the Actions panel, type the following code after the createLib() function definition:
createLib(7);
This line of code invokes the createLib() function. In addition to executing the createLib() method, you're also sending the function the number 7 as the num argument. Therefore, seven Sound objects are created.
Save the Flash document and test it (Ctrl+Enter or ?+Enter). Although you won't hear or see anything special happen, choose Debug ð List Variables in the Test Movie environment. The Output panel opens and displays the Sound objects, among other variables and objects:
Variable _level0.aSounds = [object #2, class ‘Array'] [
    1:[object #3, class ‘Sound'] {
      id3:[getter/setter] undefined,
      duration:[getter/setter] 1752,
      position:[getter/setter] 0
    },
    2:[object #4, class ‘Sound'] {
      id3:[getter/setter] undefined,
      duration:[getter/setter] 1602,
      position:[getter/setter] 0
    },
    3:[object #5, class ‘Sound'] {
      id3:[getter/setter] undefined,
      duration:[getter/setter] 1822,
      position:[getter/setter] 0
    },
    4:[object #6, class ‘Sound'] {
      id3:[getter/setter] undefined,
      duration:[getter/setter] 1672,
      position:[getter/setter] 0
    },
    5:[object #7, class ‘Sound'] {
      id3:[getter/setter] undefined,
      duration:[getter/setter] 1660,
      position:[getter/setter] 0
    },
    6:[object #8, class ‘Sound'] {
      id3:[getter/setter] undefined,
      duration:[getter/setter] 1728,
      position:[getter/setter] 0
    },
    7:[object #9, class ‘Sound'] {
      id3:[getter/setter] undefined,
      duration:[getter/setter] 1785,
      position:[getter/setter] 0
    }
  ]
Close the Test Movie window and return to the Flash 8 authoring environment. Select frame 1 of the actions layer, and add this last bit of code to the Script pane:
aSounds[0].start();
The first line of code targets the first declared element, 0, of the aSounds object, and tells it to begin playback with the start() method of the Sound class. Remember thatelement 0 in the array is a Sound object, which references the key_1 ID in the Library.
Save the Flash document and test it. You will hear key_1 sound (key_1.wav or key_1.aif) play.
Now you should practice targeting these Sound objects from other event handlers, such as buttons and more keyframes. To access a different sound, simply change the number in the array brackets. In the next chapter, you'll learn how to load a Flash movie file (.swf) into another Flash movie, as well as how to load MP3 files directly into the movie.
| On the CD-ROM |
You can view the completed sound library movie, soundLib_ActionScript.fla, located in the ch27 folder of this book's CD-ROM. We've also included a bonus file, soundLib_onSoundComplete.fla, that demonstrates the onSoundComplete() handler of the Sound class. This handler detects when a sound has finished playing. In the bonus example, each sound plays successively, from key_1 all the way through key_7. |
| Caution |
You should attach only one sound per timeline (or Movie Clip instance). While you can create more than one Sound object instance on a timeline, you cannot use the setVolume() method of the Sound class to control each individual sound — the volume will be set for all Sound object instances on the targeted timeline. |
Two other methods of the Sound class, setTransform() and getTransform(), work with transform objects with specific properties to control volume distribution across channels. You need to create a generic object using the object constructor before the setTransform() method can be used with a Sound object. This generic object will become a soundTransformObject once you have assigned sound channel properties to the generic object.
Luckily, the soundTransformObject doesn't have as many properties as the ColorTransform class, and they're much simpler to predict with trial-and-error testing. The properties of the soundTransformObject are
ll — The percentage of left channel output in the left speaker
lr — The percentage of right channel output in the left speaker
rr — The percentage of right channel output in the right speaker
rl — The percentage of left channel output in the right speaker
The first letter of each property determines which physical speaker is being affected. The second letter determines which channel's output (or its volume) is played in that speaker. Each property can have a value between -100 and 100.
| Tip |
Use the soundTransformObject to vary the output of the sounds in the soundLib example you created in this section. As with the setTransform() example for the Color object, create buttons that create and execute unique transform settings. |
In this section, you learn how to control the volume and balance output from a Sound object using the slider mechanism from Chapter 25, "Controlling Movie Clips." The slider mechanism works by taking the X position value of the slider's bar and applying it a property of another object. In Chapter 25, you applied the position value of the bar to Movie Clip properties such as _xscale, _yscale, and _alpha. In this exercise, you apply the position values to the setVolume() and setPan() methods of the Sound object to control the volume and balance output, respectively.
| On the CD-ROM |
In this section, you need to use the slider_basic_104.fla file, located in the ch25 folder of this book's CD-ROM. If you want to learn how this slider was built, read Chapter 25, "Controlling Movie Clips." |
The first part of this exercise shows you how to add the slider to a new document, import a sound, and control the volume of the sound with the slider. In the last steps, you apply the same methodology to the balance slider.
Open your copy of the slider_basic_104.fla file via the File ð Import ð Open External Library command.
Create a new Flash document (File ð New). Save this document as soundSlider_100.fla.
Rename Layer 1 to mcVol.
Drag the sliderClip symbol from the slider_basic_104.fla Library panel to the new document's Stage. When you have finished, close the slider_basic_104.fla Library panel.
With the slider instance selected on the Stage, open the Property inspector. Name the instance mcVol. In the Transform panel, rotate the instance -90 degrees. (You can also use the Free Transform tool to rotate the instance.)
Now you need to create a Sound object. Import a sound file into the Flash document. Use a sound file that is at least 20 seconds long. You can import the atmospheres_1.wav (or .aif) file located in the ch15 folder of this book's CD-ROM.
Once you have imported a sound file, select the sound in the Library panel. Right-click (Control+click on Mac) the sound file and choose Linkage in the contextual menu. In the Linkage Properties dialog box, select the Export for ActionScript check box and type sound_1 in the Identifier field. Click OK to close the dialog box.
Create a new layer on the Main Timeline (that is, Scene 1), and name the layer actions.
Select frame 1 of the actions layer and open the Actions panel (F9). In the Script pane, type the following code:
| Note |
This code uses ActionScript 2.0's strict typing feature to declare the sndBg variable as aSound data type. Notice that once you declare the data type of a variable, you'll see the code hints for the data type (in this case, the Sound class) appear after you type the variable's name, sndBg, followed by a period. |
This code creates the Sound object that the mcVol instance will control. Line 1 uses the new Sound() constructor to establish a Sound object name sndBg. Line 2 links the sound_1 asset (that is, the sound file in the Library) to the sndBg object. Line 3 plays the sound, starting at the beginning of the sound (0), and looping it 999 times for near-indefinite playback.
Save your Flash document. Test the movie (Ctrl+Enter or ?+Enter). You will hear the sound attached to the sndBg object begin to play. However, if you click and drag the bar on the slider, you will not hear a volume change.
To change the volume of the sndBg object, you need to take the position of the bar in the slider and apply its value to the setVolume() method of the sndBg object. You'll use ActionScript's event handlers to accomplish this.
Select frame 1 of the actions layer on the Main Timeline. Open the Actions panel, and insert the following code after the last action in the Script pane:
var mcVol:MovieClip;
mcVol.onMouseMove = function():Void {
 var nVol:Number = this.mcPos._x/2;
 sndBg.setVolume(nVol);
};
This code declares an onMouseMove() handler for the mcVol instance. Each time a mouse move is detected, the function defined for this handler executes. The first line of the function retrieves the current _x value of the mcPos instance inside of mcVol and divides it by 2. (See our coverage of the slider in Chapter 25, "Controlling Movie Clips" to learn more about this operation.) This value, declared as nVol, is then applied to the setVolume() method of the sndBg object.
Save your Flash document again, and test it. Click and drag the bar on the slider. As you move it up, the sound increases in volume. As you move it down, the volume decreases.
Creating a slider that controls the balance output is almost identical to the process of creating the mcVol instance. You will make another instance of the sliderClip symbol, and add a new onMouseMove() handler for the new instance.
Create a new layer on the Main Timeline, and name it mcBal.
Drag an instance of the slider symbol from the Library to the Stage. Place the instance to the right of the mcVol instance. In the Property inspector, name the instance mcBal.
Select frame 1 of the actions layer, and open the Actions panel. After the last line of code in the Script pane, type the following code:
var mcBal:MovieClip;
mcBal.onMouseMove = function():Void {
 var nPan:Number = this.mcPos._x - 100;
 sndBg.setPan(nPan);
};
This code declares an onMouseMove() handler for the mcBal instance. When the mouse moves within the Flash movie, the function for the onMouseMove() handler executes. In this function, though, we need to translate the _x property of the mcPos instance differently. Because pan values are within a range of -100 to 100, we need to map the 0 to 200 range of the slider accordingly. In order for the lowest value (0) to equal -100 and the highest value (200) to equal 100, you simply subtract 100 from the current _x property value returned by the position instance. You then apply this value to the setPan() method of the sndBg object.
Save your Flash document and test it. As you drag the bar on the mcBal instance to the right, you should hear the sound play in the right speaker. As you drag the bar to the left, you should hear the sound play in the left speaker.
| On the CD-ROM |
You can find the completed soundSlider_100.fla file in the ch27 folder of this book's CD-ROM. |
Volume Control Gadgetry, by Carla Diana
This tutorial covers strategies for controlling sound volume via graphic elements on the screen, in a similar fashion to some of the sound toys displayed in the interactive music project repercussion.org (www.repercussion.org). What I discuss here is the idea of "mapping" volume to another interactive element — in this case a user action such as mouse movement. Ultimately you'll look at creating an on-screen "gadget," a small box on the screen with a lid that the user can open and close by clicking and dragging with the mouse.
Part 1: Controlling the box lid
First you'll program the onPress event so that ActionScript pays attention to mouse movement until the mouse is released. You'll use enterframe so that you can have the box animation respond immediately and repeatedly to changes in the position of the cursor as it's dragged.
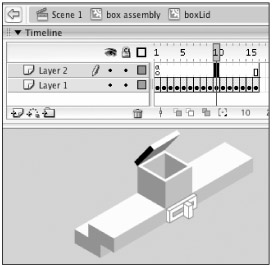
Open the tutorial file named box_start.fla located in the ch27/cdiana folder of this book's CD-ROM. You should see a Movie Clip of a box on the stage, as shown in Figure 27-7. Within that Movie Clip is another clip that contains just the box opening animation. This animation was created using a 3D rendering program called Cinema 4D, but you can use this technique for any series of frames in an animation. Note that the lid animation is separate from the static part of the box so that Flash doesn't have to redraw the entire box each time. There's a stop action at the first frame so it won't move past frame 1 if you don't want it to.
Give the box an instance name by typing box1 into the Property inspector.
Next, give the user the ability to open and close the box lid using the mouse. The idea behind this is when the mouse is pressed you'll use a variable (startY) to remember the Y location where the user first started dragging, and then continuously monitor the mouse position using an onEnterFrame handler. Create a new layer named actions, and add the following code to frame 1 of this layer, then select frame 1 and open the Actions panel.
box1.lid.onPress = function(){
   var startY:Number = _ymouse;
   this.onEnterFrame = function(){
      var yMove:Number = _ymouse - startY;
      trace(yMove/this._totalframes);
   };
};
Save your file, and test it (Ctrl+Enter or ?+Enter). When you test the movie, you'll see the value for yMove in the Output panel. This number will decrease as you drag the lid up, and increase when you drag it down. You can view the completed step in the box_part1Step3.fla file in ch27/cdiana folder of this book's CD-ROM.
Write an onRelease handler for the box1.lid instance so that the monitoring stops when the user stops dragging. You do this by simply deleting the onEnterFrame handler. Add this code after the actions you inserted in Step 3.
box1.lid.onRelease = function(){
   delete this.onEnterFrame;
};
It's always a good idea to also define the onReleaseOutside event when defining onRelease in order to account for those moments when the user lets go of the mouse while it's no longer resting on the graphic itself. This just means adding the onReleaseOutside handler to the existing code as follows:
While monitoring mouse position, you'll send the box1 instance to a new frame when there is enough change in position. Imagine that 200 pixels up is the most the user will move. This means that dividing -200 by the number of frames in the lid movie will give you a "divider" number that you can use to make the box1.lid instance go to a new frame. You can access the number of frames using the _totalFrames property of the box1.lid instance.
To figure out the divider and save it in a variable, you'll use
var divider:Number = 200/this._totalframes;
To figure out the change in frames, you'll want to look for this value:
yMove/divider
You use this as the instance name because you are already inside a function scoped for the box1.lid instance.
Since the previous value is negative, you'll want to multiply by -1, so that you make a positive change in frame numbers when the mouse movement is negative, and vice versa. This means now you're looking for:
-1*yMove/divider
| Tip |
If you ever want the absolute value of a number, you can use the Math.abs() function. So, another way of saying -1*myValue is Math.abs(myValue) — but only when myValue has a negative value. |
It's a good idea to round off this number since you're only interested in using it to send the playhead to a certain frame, meaning that you only want whole numbers. Use the Math.ceil() method so that it rounds up.
Math.ceil(-1*yMove/divider)
Now that you understand the logistics behind the interactivity, add the following code to the script on frame 1 of the Main Timeline (that is, Scene 1):
box1.lid.onPress = function(){
   var startY:Number = _ymouse;
   var divider:Number = 200/this._totalframes;
   this.onEnterFrame = function(){
      var yMove:Number = _ymouse - startY;
      trace(Math.ceil(-1*yMove/divider));
   };
};
| On the CD-ROM |
You can check out the progress so far by opening up the file box_part1Step5.fla, located in the ch27/cdiana folder of this book's CD-ROM. |
Finally, you want to move relative to where the user first clicked, meaning that you are looking for the change in vertical movement, not absolute positions. In other words, a value of 2 will not send you to frame 2; instead, it will send you to a frame that's two more than the frame you started on with the first mouse click. You'll add a line to the beginning of the onPress handler that lets you remember the frame you started on, and store it in a variable called startFrame. The code now looks like this:
box1.lid.onPress = function(){
   var startY:Number = _ymouse;
   var startFrame = this._currentframe;
   var divider:Number = 200/this._totalframes;
   this.onEnterFrame = function(){
      var yMove:Number = _ymouse - startY;
      var newFrame:Number = Math.ceil(-1*yMove/divider) +
         startFrame;
      this.gotoAndStop(newFrame);
   };
};
The only thing added is computing the new frame number value. You use this.gotoAndStop to actually send the box1.lid frame to the right place.
The last bit of cleanup for Part 1 involves checking the limits of the new frame value to make sure you don't go lower than 1 or higher than the last frame of the movie. You can do this using an if-then statement, or some clever use of the Math.min() and Math.max() methods.
newFrame = Math.min(Math.max(1, newFrame), this._totalframes);
This line of code will set newFrame equal to itself unless it's smaller than 1 or larger than the total number of frames. In those cases it will get set to 1 or the last frame number, respectively. Insert this line before the gotoAndStop() action and you're good to go.
| On the CD-ROM |
Check out the box_part1Step7.fla file in the ch27/cdiana folder of this book's CD-ROM to see this code in action. |
Part 2: Controlling volume
So now that you have your box lid resting on a different frame every time the user interacts with it, you can use that number to tell us where our sound volume should be. First, we need to create a Sound object and get control of its volume; then in Part 3 you'll link up the box lid value to the volume. You'll be using a very basic tone (which can be created using any program that can generate MIDI sounds; in this case, Melody Assistant X) and looping it so it plays continuously and sounds like one sound, rather than a series of "beats."
| Web Resource |
You can find more information on Melody Assistant at www.myriad-online.com/en/products/melody.htm. |
Create a new Sound object in ActionScript. In the sample file, a new layer named sound was created for the actions that correspond to the sound code. Here is the ActionScript for creating the Sound object:
s1 = new Sound(box1);
Note the box1 instance name in parentheses. It's a good idea to associate the sound with a MovieClip instance because things like volume and panning are specific to each MovieClip instance.
Attach a sound to the Sound object. In this case the sound has already been imported, but if you're starting from scratch you'll need to import it yourself via File ð Import. Here is the ActionScript for attaching the sound:
s1.attachSound("C");
The "C" is the sound's linkage identifier. If you right-click (or Control+click on the Mac) on the sound named MiddleC.aif in the scale folder of the Library panel and select Linkage in the contextual menu, you'll get the dialog box shown in Figure 27-8.
Next, you'll actually play the sound:
s1.start(0, 999);
The 0 right after the parentheses corresponds to a time offset in the start of the sound, and the 999 is the number of loops. This is a short tone that you want to play continuously, so you'll also want to make sure to replay the sound when it's done with all the loops — unfortunately you have to give it a finite number of loops instead of just telling it to loop forever.
s1.onSoundComplete = function(){
   s1.start(0, 999);
};
To control the volume of the sound, add the following code:
For your box lid gadget, you'll want the volume to be set to 0 when the lid is completely closed, and set to 100 when the lid is at the last frame of the animation.
If you've never worked with the sound object, you might want to do some quick tests with the setVolume() method to see how the different values sound.
| On the CD-ROM |
You can use the box_part2Step4.fla file found in ch27/cdiana on this book's CD-ROM. Change the value in the setVolume() method to see how the volume changes. |
Part 3: Putting the audio and visual controls together
At this point you know how to control volume, and you know how to set up interaction to let the user control the box lid opening. All you have to do to get your gadget working is put them together and you've linked the action of the box lid opening to the volume.
The key to linking the two actions is getting the numbers to relate to each other in the correct proportions. One number is the frame number corresponding to the current location of the box lid animation, and what you'll want to do is make the volume relate to this number. You can say that the two values need to be "mapped" to one another.
Calculate a fraction that describes how "open" the box lid is, taking its current frame location and comparing that to all the frames in that animation. From within the onEnterFrame handler for the box1.lid instance, we need to determine this value:
var howOpen:Number = this._currentframe/this._totalframes;
Next, multiply this fraction by 100 in order to scale the value to match the range of the volume (0 to 100). You can rewrite the code to look like this:
var howOpen:Number = 100*this._currentframe/this._totalframes;
Now that you have a number from 0 to 100, you can set the volume equal to it using the setVolume() method. To simplify things, give it a whole number by taking a Math.floor() value, rewriting the howOpen definition just one last time:
var howOpen:Number = Math.floor(100 *
   this._currentframe/this._totalframes);
s1.setVolume(howOpen);
| On the CD-ROM |
You can test this code in the box_part3Step3.fla file found in the ch27/cdiana folder of this book's CD-ROM. |
There's one small problem with this movie. When you trace howOpen, you'll see that it never reaches 0, which means that even with the box lid closed there will still be some volume. This is happening because the lowest the _currentframe value can ever be is 1, and the lowest fraction in this case will be 1 divided by the total number of frames, or 1/16. To resolve this, you can make the fraction into one that begins at 0 by subtracting 1 from the frame value. If you also subtract 1 from the total number of frames, you will wind up with the range we need:
var howOpen:Number = Math.floor(100*
   (this._currentframe-1)/(this._totalframes-1));
s1.setVolume(howOpen);
You could also have used the variable newFrame from Part 1 instead of this._currentframe; it indicates the same value. Note that in the meantime you should make sure that the volume code that you were playing with in Part 2 defaults to the following so you start out with silence when the box lid is closed:
s1.setVolume(0);
You're done! Test out your file, and have fun! Try combining a number of these gadgets and attaching a different tone to each one so that they can all play in unison. You can also take this principal of mapping volume to a value and use it with other mouse movements, or use it to match a MovieClip property such as _alpha, _width, _height, _x, _y, and so on.
A quick side note
The Publish Settings for Audio event for this file are set to Raw, rather than one of the more common compression schemes like MP3. The reason for this is that with small looping tones it's essential that the sound loop seamlessly, and the compression will often clip the sound just a tiny bit. It's small, but very noticeable to the ear. In general, with special sound treatments like this one, it's often necessary to do a bit of trial and error testing to see how low you can go with compression before the sound quality gets degraded in some way that's no longer acceptable. Figure 27-9 shows part of the Publish Settings dialog box.