18.1 Template Basics
Templates let you build pages that share a similar structure and graphic identity,
quickly and without having to worry about accidentally deleting or changing elements.
They come in very handy when you're designing a site for which other, less
Dreamweaver-savvy individuals are responsible for adding new pages. If you use a
template, these underlings will be able to modify only the areas of a page that you,
the godlike Dreamweaver guru, define.
 |
Macromedia Contribute, a simple, word processor條ike program for updating Web sites, works very
well with sites built using Dreamweaver templates. If you build sites that are updated by people who don't
know the first thing about Dreamweaver or building Web pages, Contribute can help.
|
|
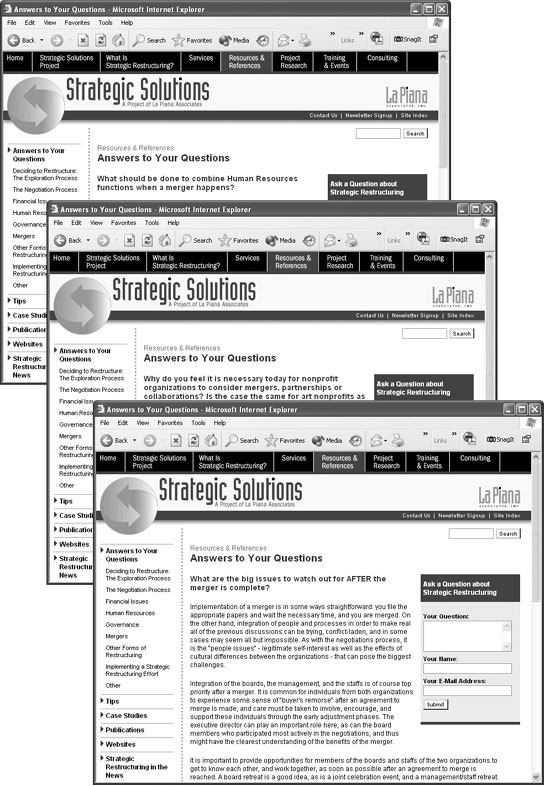
A new page based on a template梐lso called a template instance條ooks just like the template, except that you can only edit certain areas of the page, called, logically
enough, editable regions. In the example shown in Figure 18-1, one editable region includes the question-and-answer text area; the rest of the page remains untouched
and is, in fact, locked.
A Dreamweaver template can be very basic: one or more areas of a page (called editable
regions) can be changed, others can't (locked regions). But Dreamweaver also
includes many subtle ways for controlling template instances. Here's an overview of
the features you'll encounter when creating and using templates:
Editable regions. These are the basic building blocks of a template. (They work
the same as they did in earlier versions of Dreamweaver.)
An editable region is a part of a page梐 paragraph, table cell, or headline, for
example梩hat people can change on each template instance. A template page can
have mul
le editable regions梖or example, one in a sidebar area and another in
the main content section of a page.
Editable tag attributes. There may be times when you want to make a particular
tag property editable. For instance, if you want to specify a different background
color for each page, you'll want to permit changes to the <body> tag's Bgcolor
property.
Or perhaps you've built a template that includes a photo with some complex formatting
(left-aligned by a Cascading Style Sheet, perhaps). Turning the entire image
into an editable region could pose problems: When someone creates a new page
from the template and then inserts a new photo, all of the formatting information
can get lost. Instead, you could make just the image's Src property editable. People
would then be able to insert new images for each page without inadvertently ruining
the photo's formatting. (If the Width and Height properties vary from image
to image, you can also make those attributes editable.)
Repeating regions and repeating tables. Some Web pages include lists of items:
catalogs of products, lists of news articles, albums of photos, and so on. Dreamweaver
lets you define repeatable regions for pages like this.
For example, a page of product listings might include a picture, name, and price
for each product in a catalog, organized using a table with multiple rows (
Chapter 7).
As template builder, you may not know in advance how many products the page
will eventually list, so you can't fully design the page. However, you can use Dreamweaver
to define a row梠r any selection of HTML梐s a repeating region, so that
page authors can add new rows of product information when needed.
Optional regions and editable optional regions.
Optional regions make templates even more flexible. They let you show or hide content on a page-by-page basis.
Suppose you create a template for your company's products. When some products
go on sale (but others remain full price), you could add an optional region on the
template that displays a big "On Sale!" logo. When creating a new product page,
you could show the optional region for products that are on sale and keep it hidden for the others.
Editable optional regions are similar, but they have the added benefit of being
editable. Maybe you're creating a template for an employee directory, giving each
employee a separate Web page with contact information. Some employees also
want their picture displayed on the page, while others don't (you know the type).
Solution: Add an editable optional region that would let you show the space for
a photo and add a different photo for each page. For the shier types, you would
simply hide the photo area entirely.
NOTE
If you're coming from Dreamweaver 4, the way Dreamweaver creates templates has changed signi
ficantly梥o much, in fact, that Dreamweaver 4 doesn't understand templates created by Dreamweaver
MX 2004 (or Dreamweaver MX for that matter). However, if you've created a site using Dreamweaver 4's
Template tools, Dreamweaver MX 2004 does understand those, so you can upgrade to MX 2004 and still
use them to build new pages.
Or better yet, update the old style template information to the newer MX template code following this tutorial:
www.dreamweavermx-templates.com/tutorials/tutupdate.cfm
.
Furthermore, Dreamweaver can create nested templates, which inherit design elements
from a master template. In this way, you can create a general unified design that's
shared by other templates; this feature is described in Section 18.5.
But facilitating page creation is only one of the benefits of templates. You'll also find
that templates can greatly simplify the process of updating the design of a Web site.
Like Library items, pages based on templates retain a reference to the original template
file. Any changes made to the template pass on to all pages created from it, which can
save you hours of time and trouble when it comes time to update the look or structure
of your site. Imagine how much time you'll save when your boss asks you to add "just
one more" button to the site's navigation bar. Instead of updating thousands of pages
by hand, you'll need to update only a few template files.
|