|
|
< Day Day Up > |
|
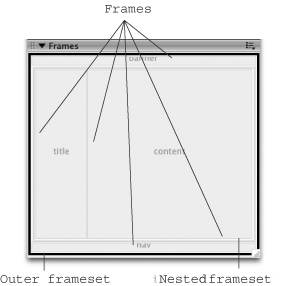
9.3 Selecting Frames and FramesetsThink of a frame as a mini document window; each frame contains a separate Web page. When you click inside the frame, you can add images, text, and other elements to the page. Click inside another frame to edit that frame's Web page. However, since framesets aren't visible elements of a Web page, Dreamweaver provides
a special windowthe Frames panelthat provides a simple visual overview of frames and framesets, making it easier for you to select and modify them. To open
it, choose Window Selecting a frameset lets you save it and modify its properties, such as frame size and whether or not there are borders, as described in Section 9.5. There are several ways to select a frameset:
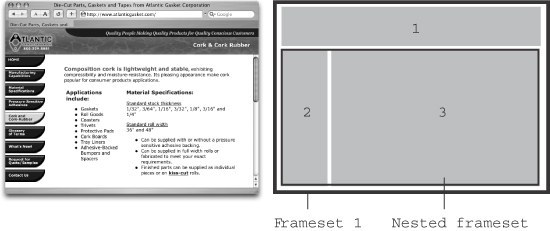
Here, frames keep the site
identity (top banner) and
navigation (left sidebar)
visible. This site is made of
three frames (numbered)
and two framesets. To create
this design, start with
a frameset divided into
two horizontal rows. Click
the bottom frame; choose
Modify
|
|
|
< Day Day Up > |
|
 Frames or press Shift-F2 (see