|
|
< Day Day Up > |
|
9.2 Creating FramesBefore you begin creating frames, think about how they might best serve your Web site's structure. For instance, if you want a banner with the Web site's logo or name to appear at the top of each page, you could create a frame at the top to hold it. Or, to help your visitors get around, you might include a navigation bar in a frame at the left of the page consisting of a list of links to the site's main sections. To create frames:
When you finish splitting or dragging, borders appear around the frames you've just created. Behind the scenes, some strange things have just happened. First, Dreamweaver has created a frameset page梐 new, untitled Web page that describes how a Web browser should draw the frames and which Web pages load into these frames?span class="docEmphasis">around the Web page you started with. Second, Dreamweaver creates new, untitled documents for each frame you added to the page. For example, in Figure 9-4, the current page was split into two frames, side by side. In the process, Dreamweaver created two new documents: a blank document for the right-side frame, and a blank document for the left-side frame. You wind up with three pages (counting the frameset page). Dragging one of the frame borders around the outer edge of a document is a quick way to create frames. When the cursor is correctly positioned to begin dragging, it changes shape (as shown here). To create additional frames within the page, Alt-drag (Option-drag) one of the inner frame borders. As you might have guessed, you can resize your frames by simply dragging the borders. But for greater precision, and to avoid some potential problems, see "Frame Size" on Section 9.5.2.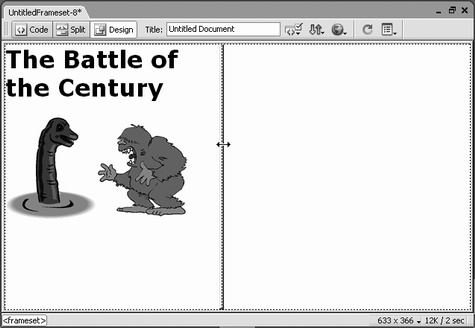
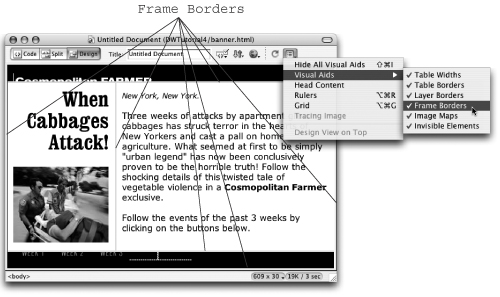
For proof, try this experiment: Click a visible portion of the original Web page you opened in step 1; note that the title bar of your window identifies its original name. Now, if you click inside one of the blank areas around your original document (that is, one of the other frames), the title bar changes to say Untitled Document. That's because you haven't yet saved or named the new Web pages that make up the new frames. You'll do that in a later step (see Section 9.4). To eliminate a frame, just drag its border back to the closest edge of the document window. NOTE
If you use XHTML for your Web pages and you want to use frames, you have a little extra work in
store. Even if you've set Dreamweaver to use XHTML for all pages (Section 0.2.2), this feature doesn't work for
framesets. As soon as you create one, Dreamweaver switches to regular HTML for both the frameset and
any frames within it. You can convert these pages to XHTML, but it's a bit time-consuming: You have to select
each page (including the frameset and all other frames) in turn and choose Edit 9.2.1 Nested FramesetsAlthough there's no limit to the number of frames you can have in a single frameset page, there are some restrictions on how you can arrange them. You can't, for instance, merge one frame into another, setting up a single frame that spans multiple columns or rows. In other words, a design like that pictured in Figure 9-6 is impossible using just a single frameset: the sidebar navigation spans the entire left side of the window, while the right side has two horizontal frames.
To overcome this limitation, you can insert a frameset inside of a frame. Nesting framesets like this gives you much greater flexibility in your designs. To nest one frameset inside another, just click inside the frame where you wish to
insert a new frameset. Then choose Modify Or, if you'd rather, you can use the Insert menu to insert frames. Choose Insert
The Frames button gives you one-click access to canned frameset designs. Click a design to create the frameset, complete with blank pages for additional frames. One frame in each button of the Frames panel is light blue; that's where Dreamweaver will put the current Web page.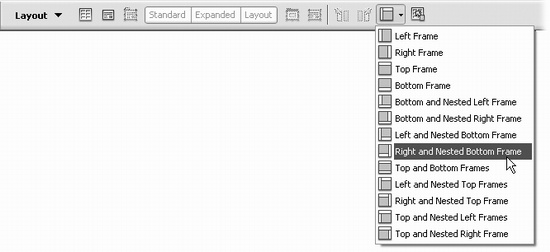
The new frameset appears inside the original frame. (Because the borders of a nested frame look just like regular frame borders, use the Frames window, as shown in Figure 9-7, to keep track of what you're doing.) |
|
|
< Day Day Up > |
|
 Visual Aids