|
|
< Day Day Up > |
|
6.4 Manipulating StylesAs with anything in Dreamweaver, styles are easy enough to edit, duplicate, or delete; all you need is a map of the terrain. 6.4.1 Editing StylesWhile building a Web site, you continually refine your designs. That chartreuse color you assigned to the background of your pages may have looked great at 2 a.m., but it loses something in the light of day.
Fortunately, one of CSS's greatest selling points is how easy it makes updating the formatting on a Web site.
Dreamweaver MX 2004 provides many ways to edit styles, some of which are new:
NOTE
Unless you're some sort of CSS guru and love to hand-code CSS, you should avoid this last option. If you don't know what you're doing, it's easy to make mistakes and perhaps even ruin your style sheet. 6.4.2 Editing Styles with the Rule InspectorThe Style Definition window (Figure 6-3) can be a rather tedious way of editing CSS properties. It's easy to use, but the categories and menus may slow down experienced CSS users. Dreamweaver MX 2004 introduces a new tool梩he Rule inspector梩o streamline the process of editing styles. The Rule inspector, shown in Figure 6-6, presents all the CSS properties in a single, compact list. To use the Rule inspector, first make sure the Tag inspector is open: choose Window The Tag inspector has two different views: a category view, which groups the different CSS properties into the same seven categories used in the Style Definition window (Figure 6-6, left); and a list view, which provides an alphabetical listing of all CSS properties (Figure 6-6, right). So that you can instantly grasp what properties you've already defined for a particular style, Dreamweaver moves previously defined properties to the top of the list, highlighting the property names in blue and listing the property settings to the right. The Rule inspector provides a fast way to edit style properties. You can view the properties either grouped by category (left) or as one long alphabetical list of properties (right).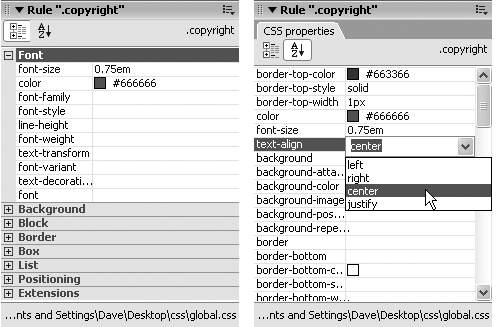
Figure 6-6 shows an example for a class style called copyright. In the category view, two font properties float to the top of the Font category: font-size and color. In the list view, you can see that the style actually has settings for six different CSS properties set梑order-top-color to text-align. You set the value of a particular property in the space to the right of the property name. Most of the time, you don't have to type in the value. Dreamweaver provides the tools you're likely to need for each property: the ubiquitous color box (Section 1.3.3) for any property that requires a color, like font color; a pop-up menu for properties that have a limited list of possible values, like the Text-align property shown in Figure 6-6; and the familiar "browse for file" folder icon for properties that require a path to a file. Some other properties, however, require you to know enough CSS to enter them manually, in the correct format. That's what makes the Rule inspector a good advanced option for experienced CSS gurus. (If your goal is to become one, you can learn about the different CSS properties starting on Section 6.7. Dreamweaver includes a built-in CSS reference so you can sharpen your knowledge of this exciting technology, as discussed on Section 10.5.) NOTE
The Rule inspector can only edit styles. You can add and remove properties with it, but you can't create, delete, or rename styles using it. Even not-so-experienced users can find the Rule inspector helpful, too. First, it's the best way to get a bird's-eye view of a style's properties. The list view is especially helpful in this regard, since all of the defined properties are listed at the top of the window. Second, for really basic editing such as changing the colors used in a style or assigning it a different font, the Rule inspector is as fast as it gets. 6.4.3 Deleting a StyleAt some point, you may find you've created a style that you don't need after all. Maybe you redefined the HTML <code> tag, for example, and realize you haven't even used the tag in your site. There's no need to keep it around taking up precious space in the style sheet. To delete a style, make sure the CSS Styles panel is open (Window
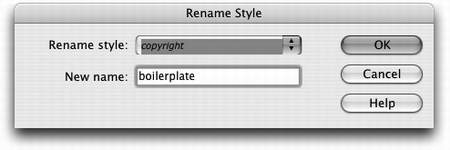
Unfortunately, deleting a class style doesn't delete any references to the style in the pages of your site. For example, if you've created a style called .company and applied it throughout your site, and you then delete that style from the style sheet, Dreamweaver doesn't remove the <span> tags or class properties that refer to the style. Your pages will still be littered with orphaned code like this?lt;span class="company">The National Exasperater</span>梕ven though the text loses the styling. (See how to solve this problem using Dreamweaver's powerful Find and Replace tool on Section 19.3.) 6.4.4 Renaming a Class StyleWhile there are many ways to change the name of a style in a style sheet (open the .css file in Code view and edit the name, for example), just changing the name doesn't do much good if you've already applied a class style throughout your site. The old name still appears in each place you used it. What you really need to do is rename the style and then perform a find-and-replace operation to change the name wherever it appears in your site. Dreamweaver MX 2004 introduces a handy new tool to simplify this process. To rename a class style:
6.4.5 Duplicating a StyleDreamweaver makes it easy to duplicate a CSS style, which can be handy when you've created, say, an HTML tag style, and now decide you'd rather make it a class style. Or you may want to use the formatting options from one style as a starting-off point for a new style. Either way, you start by duplicating an existing style. You can duplicate a style in two ways. The easiest method is to open the CSS Styles
panel (Window The Duplicate CSS Style window appears (Figure 6-8), where you can give the duplicated style a new name, reassign its Type setting, use the "Define in" menu to move it from an internal to an external style sheet, and so on. The Duplicate CSS Style dialog box looks and acts just like the New Style box (Figure 6-2). You can select a new style type, name it, and add it to an external or internal style sheet. The only difference is that the duplicated style retains all of the CSS properties of the original style.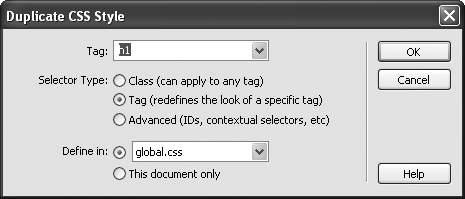
When you click OK, Dreamweaver adds the duplicate style to the page or external style sheet. You can then edit the new style just as you would any other, as described on Section 6.4. The second method involves the Edit Style Sheet window: choose Text Either way, the Edit Style Sheet window appears (Figure 6-9, left). This window lists all external style sheets attached to the page, and displays "<style>" if there is an internal style sheet. Double-click the name of the external style sheet to open a window displaying all the styles in that style sheet (Figure 6-9, right). If the page has only an internal style sheet, you'll see a window that lists all styles defined internally, much like that at right in Figure 6-9. The Edit Style Sheet window (left) lists external and internal style sheets. Double-click a style sheet to open its edit window (right). If you click Attach here, you can attach external style sheets to an external style sheet. This perfectly valid CSS technique lets a Web page link to a single external style sheet that can, in turn, reference any number of other style sheets.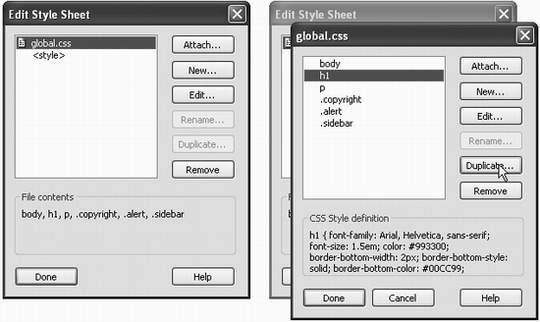
Select a style from the list, then click Duplicate. The Duplicate CSS Style window appears, as shown in Figure 6-8. At this point, proceed exactly as described above. This method requires a few more steps than using the CSS Styles panel. But it lets you duplicate multiple styles quickly梬hen, for example, you've grasped the concept of contextual selectors (Section 6.6.2) and have decided to convert all the class styles you created to contextual selectors. |
|
|
< Day Day Up > |
|
 CSS Styles