15.6 Site Reporting
The Clean Up HTML command is a great way to make sure your code is well-written.
But what if you forget about it until after you've built all 500 pages of your site? Do you
have to open each page and run the command梬hether there's a problem or not?
Fortunately, no. Dreamweaver's Site Reports feature makes identifying problems
throughout a site a snap. As well as locating the problems fixed by the Clean Up
HTML command, it makes Dreamweaver check your pages for other problems, such
as missing titles, empty Alt properties for images and other problems that might make
your Web site less accessible to disabled Web surfers.
 |
To save time when running a report, you can exclude select folders from a Site Report operation using
the Cloaking feature described in Section 16.2.3.
|
|
After running a report, Dreamweaver displays a list of pages with problems. Unfortunately,
the Site Reports feature only finds problems; it doesn't fix them. You have
to open and fix each page individually.
To run a report on one or more Web pages, proceed like this:
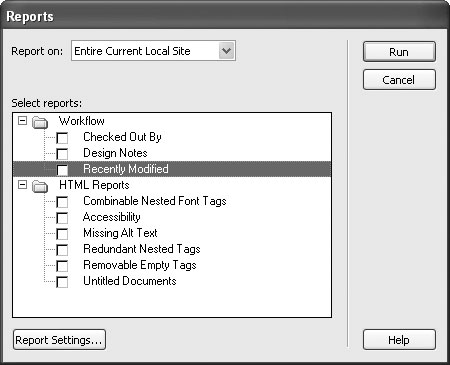
Choose Site Reports. Reports.
The Reports window opens (see Figure 15-11). From the Report On menu, select the files to analyze.
Dreamweaver can report on a single Web page, multiple pages, or even an entire
site. Choose Current Document to check the Web page that's open at the moment.
Entire Current Local Site checks every Web page in the local site folder, including
folders inside it. This option is great when you want to check your entire site prior to
uploading it to a Web server and making it "live" (more on that in Chapter 16). Selected Files in Site checks only the files you choose in the Files panel. You need
to open the Files panel and select files in the local file list for this to work. See the
box in Section 14.1.5.1 for methods on selecting files in the Files panel. Choose this option
when you've modified or added pages to a site, and are ready to move them
to the Web server.
Folder checks all Web pages in a selected folder. After you choose this option, an
empty field and a folder icon appear. Click the folder icon; a dialog box gives you
the opportunity to locate and select the folder you wish to check, including any
folders inside it. You can also use this option when you wish to check pages that
aren't actually part of the current site. Select the types of reports you want Dreamweaver to generate.
The Reports window is divided into two types of reports. The first set, Workflow
reports, mostly deal with features that facilitate working with others as part of a
production team (see the following chapter). The last option in this group桼ecently
Modified梚s new in Dreamweaver MX 2004. It generates a list of files that
have either been created or modified within a certain number of days or within
a range of dates (February 1 of last year to the present, say). When you run this
type, Dreamweaver lists the files in the Site Reports panel and opens a Web page
listing the files in your browser. NOTE
The Recently Modified site report looks for files created or changed in the last seven days, but you can
adjust that time frame. Select Recently Modified in the Reports window and click the Report Settings button
(Figure 15-11). A window appears like the one pictured in the box in Section 15.4.1.3, where you can change the
range of dates to check.
In fact, you'll probably find the technique described in Section 15.4.1.3 more useful. It not only identifies recently
modified files, but also selects them in the Files panel, giving you a lot more options for acting on this
information. For example, with those files selected you can upload them to your Web server, run Find and
Replace operations on just those files, or access many other tools.
The second type, HTML reports, are useful for locating common errors, such as
forgetting to title a Web page or forgetting to add an Alt property to an image. Three of the HTML report options?span class="docEmphBold">Combinable Nested Font Tags, Redundant
Nested Tags, and Removable Empty Tags梥earch for pages with common code
mistakes. These are the same problems fixed by the Clean Up HTML command
(Section 15.5).The Accessibility report lets you see how usable your site is to people with disabilities.
This sophisticated command checks to see how well your pages conform to
Web accessibility guidelines mandated by the U.S. Government and recommended
by the W3C (Section 15.7). This option produces detailed reports, so it's usually best
to run it separately. Turn on Missing Alt Text to search for pages with images that are missing an alternate
text description (Section 5.2.2). If you select the Accessibility option, you can
leave this turned off; the Accessibility analyzer already includes missing Alt text. Finally, turn on Untitled Documents to identify pages that are either missing a
title or still have Dreamweaver's default title ("Untitled Document").
Click Run.
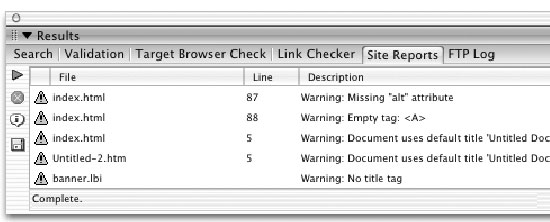
Dreamweaver analyzes the pages you specified. It then produces a report that lists
pages that match your report settings (see Figure 15-12). Each line in the Results
window displays the name of the file, the line number where the error occurs, and
a description of the error. NOTE
In the first release of Dreamweaver MX 2004, Dreamweaver also searches files that aren't Web pages,
like XML files that Dreamweaver produces behind the scenes. In Figure 15-12, you can see a file called banner.
lbi梐 Dreamweaver library file (see Chapter 17). Since a library file is just a snippet of HTML code rather than
a full Web page, it doesn't have a <title> tag (and shouldn't), so the error listed here is misleading.
This is one of the glitches that Macromedia hoped to fix in the 2004 bug-fix release. To see if the patch is
available as you read this, visit:
www.macromedia.com/support/dreamweaver/downloads_updaters.html
.
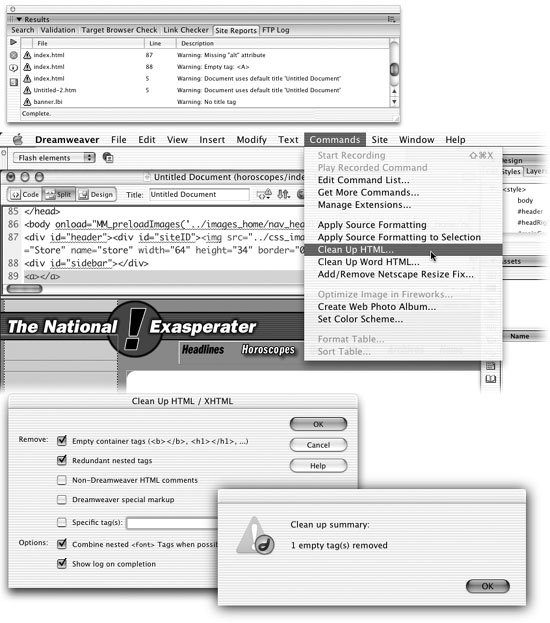
In the Results panel, double-click the file to open it (see Figure 15-13).
Dreamweaver opens the file and automatically highlights the offending code. NOTE
The Site Report command won't identify XHTML syntax errors like those fixed by the Clean Up XHTML
command (Section 15.5).
Fix the problem according to its type.
For a page containing Combinable Nested Font Tags, Redundant Nested Tags, or
Removable Empty Tags errors, use the Clean Up HTML command as described
in Section 15.5. For pages missing a title, add one using the technique described in Section 1.2.1. For Accessibility problems, read the detailed discussion starting in Section 15.7. You can add Missing Alt properties using the Property inspector, as described
in Section 5.2.2, but you may find it faster to use Dreamweaver's powerful Find and
Replace command (Section 19.3). Continue opening files from the Results window and fixing them until you've
corrected each mistake.
Unfortunately, Dreamweaver doesn't provide a quick, one-step method to fix any
of these problems. Except when using the Find and Replace tip for adding missing
Alt text, you must open and fix each page individually.
If you want to save the results of your report, click the Save Report button. Dreamweaver
opens a Save As dialog box, and lets you save the report as an XML file.
|