5.1 Adding Images
If you were writing out the HTML instructions for your Web page by hand, you'd
insert an image into a Web page using the image tag?lt;img>. The primary property
of an image is called the source (Src) property, which is the URL or path to the graphics file.
Dreamweaver does all of this coding for you automatically when you insert a picture
into your fledgling Web page:
Save the Web page that will contain the image.
In order to insert an image, Dreamweaver must determine the path from your Web
page to that image, which could be anywhere on your hard drive. As with links (see Section 4.2), saving the page before you proceed enables Dreamweaver to correctly determine the path from the image to the page you just saved.
|
Computer graphics come in hundreds of different file formats.
The assorted acronyms can be mind-numbing: TIFF,
PICT, BMP, EPS, Amiga IFF, and so on.
Fortunately, graphics on the Web are a bit simpler. There
are only three graphics formats梩wo established formats and
one exciting newcomer. All three provide good compression;
through clever computer manipulation, they reduce the
graphic's file size so it can travel more rapidly across the
Internet. They differ only in the details.
GIF (Graphics Interchange Format) files provide good
compression for images that have areas of solid color: logos,
text, simple banners. GIFs also offer single-color transparency,
meaning that one color in the graphic can be made
to disappear, permitting the background of a Web page to
show through part of the image.
A GIF image can only contain a maximum of 256 shades,
generally making photos look blotchy. That radiant sunset
photo you took with your digital camera won't look so
good as a GIF.
JPEG (Joint Photographic Experts Group) graphics, on the
other hand, pick up where GIFs leave off. JPEG graphics can
contain millions of different colors, making them ideal for
photographic images. Not only do JPEGs do a better job on
photos, they also compress much better than GIFs, because
the JPEG compression algorithm considers how the human
eye perceives different adjacent color values. When your
graphics software saves a JPEG file, it runs a complex color
analysis to lower the amount of data required to accurately
represent the image. On the downside, JPEG compression
makes text look blotchy.
Finally, the PNG (Portable Network Graphics) format holds
great promise for the future. These files can be compressed
even smaller than those in GIF format, can contain millions
of colors, and offer 256 levels of transparency, which
means that you could actually see through a drop shadow
on a graphic through to the background of a Web page.
Only the most recent Web browsers recognize this format
(and even some of those don't recognize PNG's 256 levels
of transparency), so you'd be well advised to avoid PNG
graphics for the moment.
|
In the document window, click where you want to insert the image.
This might be at the beginning or end of a paragraph, or within a cell in a table
(see Chapter 7). To set a graphic apart from other text, press Enter, creating a blank
line, before inserting it.
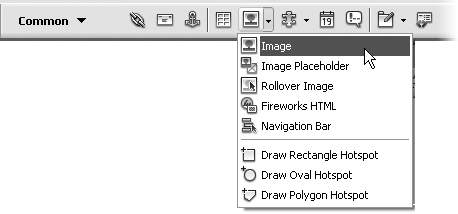
Choose Insert Image. Image.
Alternatively, you can select Image from the Insert bar (see Figure 5-2). Or, if you're
a keyboard nut, press Ctrl+Alt+I (Option- -I). -I). In any case, the Select Image Source dialog box opens. This box is identical to the
Select File window that appears when adding a link to a page (see Figure 4-3). The
only difference is the Preview Images checkbox梩urning it on shows a thumbnail
of any selected image in the Preview window. Browse to and select the graphics file you wish to add to the page.
The file must be in one of the formats that work on the Web: GIF, JPEG, or
PNG. The file should be stored somewhere in the local root folder of your site (see Section 1.3) or in one of its subfolders. If it isn't, Dreamweaver can't add the correct path
to your Web page. That's why, if you select a graphic for insertion that's not already in your site folder,
Dreamweaver offers to add a copy of it there. If you choose Yes, a Copy File As
dialog box opens, so that you can save the file in your local root folder, renaming
it if you wish. If you choose No, Dreamweaver uses a file-relative path (beginning
with File:///) for the image's Src property (see Section 5.1). But clicking No is usually
a bad idea: While it allows the graphic to be displayed while you work with
Dreamweaver on your computer, the graphic won't appear once you move the
document to the Web (see the box in Section 4.3). Choose the type of path to create: Document or Site Root.
When you insert an image into a Web page, you don't actually add the graphics file
to the HTML file. Instead, you create a path to the image, a coded description of
where a computer can find the relevant graphics file, so that a Web browser knows
where to look for and download the graphic. In general, Document is the best choice. Site Root-relative paths don't always
work when previewing a page. (See Section 4.1 for detail on the difference between
document- and root-relative links.) Click OK (Windows) or Choose (Mac OS X).
The image appears on your Web page.  |
Dreamweaver also permits several drag-and-drop techniques for quickly adding images to your
pages.
Make sure you've defined a site as described in Section 1.3.1. Then open the Files window (press F8). You can
drag any graphics file from that window right into an open Dreamweaver document. You can also drag
graphics in from the Assets panel, as described in Section 14.3.
Dreamweaver even lets you drag a graphic from your desktop onto a page. If you do this, Dreamweaver
dutifully informs you that you must copy the file into your site folder (and provides a dialog box that lets
you specify which folder), so that the image will show up properly on the Web page. (You can even define
a default images folder for a site, so that when you drag an image onto a page, Dreamweaver automatically
copies it into the correct folder; see Section 14.1.1.2).
|
|
5.1.1 Adding an Image Placeholder
It's not uncommon to find yourself working on a Web site without all the pieces of
the puzzle. You may start building a page, even when your client has yet to give you
all the text she wants on the page. Or you may find that a photograph hasn't been
shot, but you want to get the page ready for it. Other times, you may be responsible
for building the Web pages, for example, while another designer is creating the banners
and navigation buttons.
To help out in these kinds of situations, Dreamweaver includes the Image Placeholder
button. It lets you insert a placeholder梒alled an FPO (For Placement Only) image
in publishing梥o that you can stake space on the page for a graphic that isn't ready
yet. This way, you can lay out the basic structure of the page without having to wait
for all the graphics to be arrive in their final form.
To insert a placeholder, do one of the following:
Choose InsertImage Placeholder On the Common tab of the Insert bar, select the Image Placeholder icon from the
Image menu (see Figure 5-2).
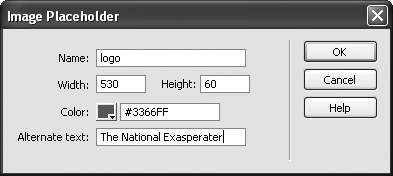
In the window that appears (see Figure 5-3), type a width and height for the image, which determines how much space the placeholder will take up on the page. The Name and Alternate Text fields are optional. (If you fill them out, they'll appear in the Name and Alt boxes of the image's Property inspector, as discussed next.)
The Color box lets you specify a color for the placeholder梡resumably to make the
placeholder more colorful than the default gray color. The color will disappear (as will
the code that created it) once you replace the placeholder with a real graphic.
Of course, using a placeholder doesn't do you any good if you don't eventually replace
it with a real image. Once you've got the image that should finally appear on the page,
just double-click the placeholder on the Web page. The Select Image Source window
appears. Follow steps 4-6 in Section 5.1 to insert the new image.
If you also own Fireworks, Dreamweaver's Web graphics companion program, there's
an added benefit to the Image Placeholder. When an Image Placeholder is selected
in the document window, the Property inspector includes a button called Create.
Clicking this button launches Fireworks (MX or MX 2004) and opens a new, blank
graphics document set to the exact dimensions you specified earlier. You can then
create your graphic in Fireworks. After you save the file, Fireworks will export it to
whatever folder you specify and automatically insert it into your document梤eplacing
the placeholder.
|